The Wave Crew Wave Petunias | Wave Pansies
Now that your garden is planted, it’s time to make it personal! One craft project you can easily do at home is place painted natural stones in your garden. You can add some with whimsical creature designs, use them to identify plants and herbs, or memorialize a loved one or special event. Plus painting stones is a perfect craft to do with the kids or grandkids on a rainy day! Here are a few steps to complete the project:
Step 1 – The Stones
 Look for smooth stones. Rounded river stones are good, or large, flat stones gleaned from the beach. Craft stores also sell natural stones by the bag-full. Look for unusual shapes, too. If you have an animal design in mind, look for a stone that can be painted with that shape (i.e., tall and oblong for an owl, or long and oval for a dog or cat)
Step 2 – The Paints
 For a longer-lasting paint job, use acrylic. This will stand up better to weather and rain. And brightly colored or neon paints show up best against the dirt (and your flowers). For more detailed work or writing a name or quote, use fine-point markers (like Sharpie® pens). There’s a whole rainbow of colors to choose from. Marker paints is another option. They offer the convenience and control of a pen with the look of paint.
Step 3 – Let’s Begin
Make sure the stones are clean and completely dry. Wash any dirt or debris off with dish soap – scrubbing if necessary. Then apply two coats of a background color, allowing the first to dry completely before adding the other. A background color will also help your design or message stand out against the typical gray of the stone.
Step 4 – Take It Further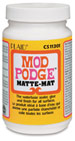
To personalize, you can hot-glue glass-beads and plastic jewels, or apply stickers to the painted surface. To make your stone shimmer, apply glue to the stone and sprinkle with glitter. Then, once it’s dry, follow up with a coat of decoupage glue (like Mod Podge®). You can also print out pictures from the computer and apply them with an outdoor-rated decoupage glue.
Step 5 – Seal The Deal
When your design is complete, seal your finished stone completely with a coat or two of outdoor-rated Mod Podge® to help your stone hold up against the elements. Once it’s dry, place it in a special location for everyone to see!