You can preserve the beauty and color of your garden with pressed flowers! It’s time to DIY, get crafty and and gather some of your favorite Wave petunia blooms.
What you’ll need:
A pair of scissors
Basket
Flower press or a sturdy, heavy book
Instructions:
First, you’ll need to scan your garden, containers and baskets for the brightest blooms. The newest and freshest flowers are the ones you’ll want to pick. When you find ones you like, simply snip them at their base with a pair of scissors and collect them in a basket or container with a handle. The secret is the drier the petals are when picked, the better they will press. The best time to go out to harvest your flowers is in the late-morning after the dew has dried or early evening before it returns.
Next, make sure to keep your picked blooms out of direct sunlight to keep them fresh. Once you bring the flowers indoors, you’ll want to get them into your press asap. Don’t wait until they start to wilt. It’s also a good idea to sort your flowers by type. This way, they’ll dry at the same rate.
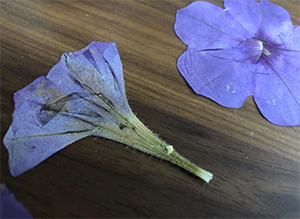
Then, arrange your petunia blooms face down on sheets of white paper. Make sure none of the blooms touch otherwise, when they dry, they’ll get stuck together! The paper helps to draw the moisture out of the petals and also makes sure your blooms don’t directly stick to your flower press or the pages of your book.
There are two ways to press flowers, depending on what’s your fancy: 1) a sturdy, heavy book or 2) a flower press. Store-bought flower presses can be expensive! And considering that the cost of the supplies needed to build one is actually cheaper than buying one, you can even try it yourself (see instructions for a homemade press far below).
Before inserting the petunias into your book or press, be sure to write at the top of your white paper the name of the flowers and the date you pressed them. Be sure the labeled edge sticks out, so you know what you’re pressing and how long the flowers have been drying.
Keep the flowers evenly weighted during the drying process. If you’re using a book, a cinder block or large, flat stone will do the job. The blooms in a flower press are weighted by tightening the wing nuts on the long bolts at each corner. To ensure that the distribution of pressure is even, make sure that each of the wing nuts has been tightened to the same level on each bolt.
Do not disturb the flowers for at least a month. And no peeking! Taking a peek before a month has elapsed can actually rip the flowers apart. At this stage, they tend to wrinkle when closed back up. So sit back, relax and let the press/book do its magic!
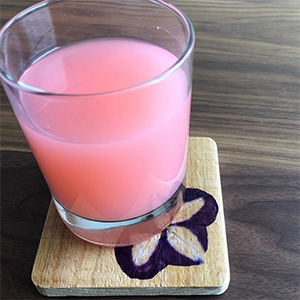
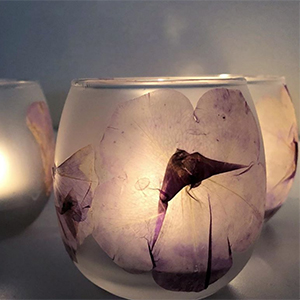
Finally, after a month has passed, you’ll be able to open your beautifully pressed flowers. The possibilities are endless, so start creating your own designs and décor. Laminate a garden journal, scrapbook or even decorate business cards for a personal touch. Pressed flowers also make wonderful Christmas ornaments and candles. You can also combine some of your favorite pressed Wave petunias and put them into a frame for yourself or as a special gift.
Building a Homemade Flower Press
(courtesy of Fine Gardening magazine: https://www.finegardening.com/article/pressing-flowers)
Materials:
2 pieces of plywood
4 lag screws
Washers
Wing nuts
And a few pieces of cardboard
Assembly:
The size of your flower press will depend on the size of the flowers and plants you want to preserve.
Step 1 Cut two pieces of plywood for the top and bottom layers of the press. These pieces can be as big or small as you want them to be. They just need to be the same size.
Step 2 Drill holes through the four corners of both the top and bottom pieces of wood. The holes must be large enough to accommodate the lag screws.
Step 3 Insert the lag screws through the holes drilled into the bottom piece of the press.
Step 4 Layer alternate pieces of cardboard, white paper, and flowers inside the press. The number of layers depends on how many flowers you have to press.
Step 5 Place the top piece of wood onto the press, threading the lag screws through the holes.
Step 6 Tighten the layers together by spinning the wing nuts down the bolts onto washers to create even pressure.